This is a quick guide to getting started and running your first test. We thought it would be helpful for those getting started and checking their first calibration before running tests with actual samples. We will also continue to explore and share more information about calibration options, general maintenance, and data export methods using the DA-130N portable density meter in future posts.
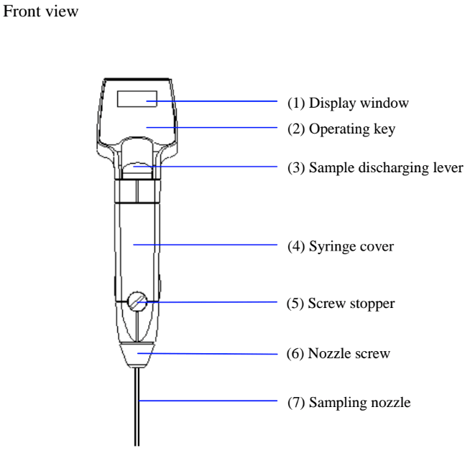
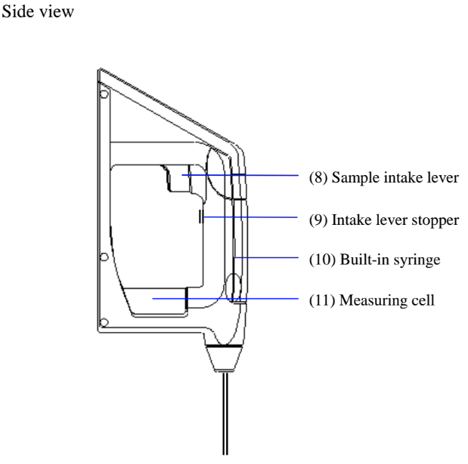
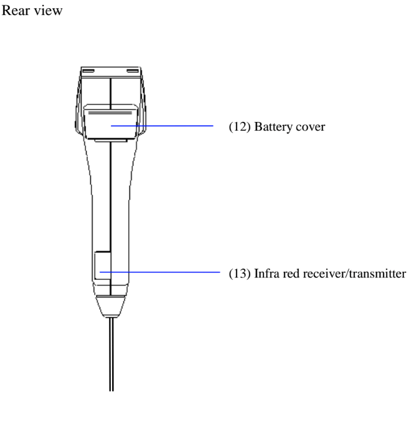
First, lets review and identify the parts of the DA-130N Portable Density Meter:

O.K. Now let's get started and install three 'AAA' batteries...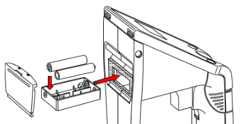
...And then attach the sampling nozzle. 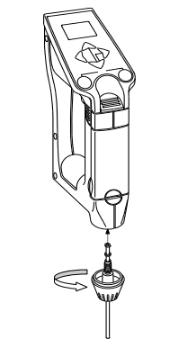
A few words about precautions when taking test measurements.
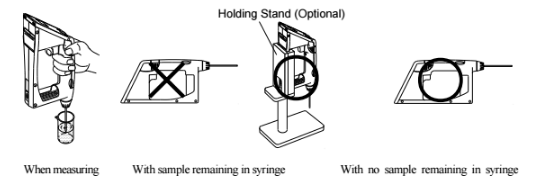
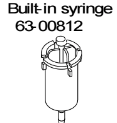
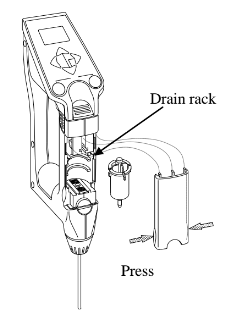
When measuring a sample make sure to hold the instrument so that the sampling nozzle is vertical to the ground. When laying down the instrument between or after measurements make sure to drain the remaining sample from the built-in syring (the built-in syringe is located inside the meter right above the sampling nozzle).
Now let's run a preliminary test using water.
- Make sure the sample discharging lever is pushed down to the bottom.
- If not, slowly push it down with your thumb.
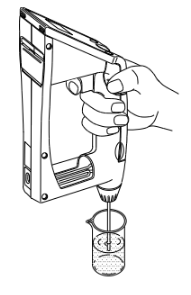
- Dip the sampling nozzle in the sample liquid.
- Slowly pull the sampling lever with the forefinger. When the cell is filled with sample, release your finger.

Calibration of the measuring cell using pure water
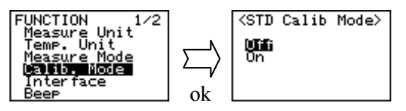
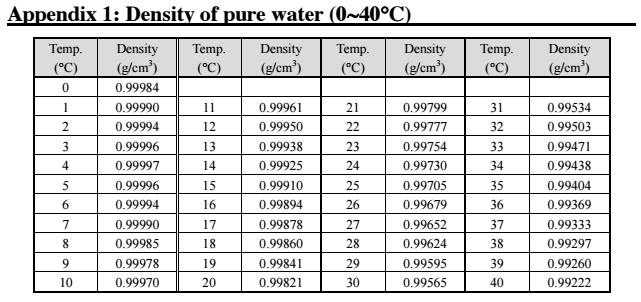
Set calibration mode to OFF. Press the [esc] key 2 times to return to the main menu. Sample pure water making sure no air bubbles are visible. The measuring cell with pure water can be calibrated automatically with the key entries as follows: Press [cal.] key for more than 2 seconds to show CALIB(Water) (inversed colo on the display) showing calibration with pure water in progress.
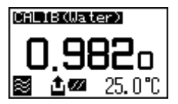
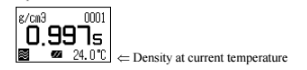
After calibration is over the deviation from the theoretical value will be shown so that you can check if the calibration has been successfully completed.

Note: if after attempting re-calibration of the measuring cell and results are still not within specifications it is possible the measuring cell itself is contaminated. In this case ensure to carefully clean the measuring cell and then re-calibrate again.
Note 1: You can also calibrate with a standard liquid that has a known density. Sometimes calibrating with a liquid that has a similar density to your test samples will help improve precision.
Note 2: You can also calibrate with air.
Some other useful things to know when working with different types of samples:
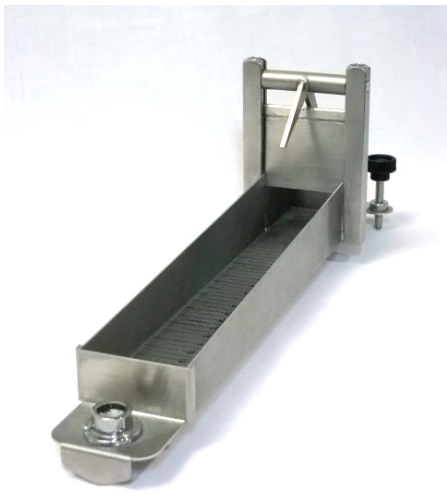
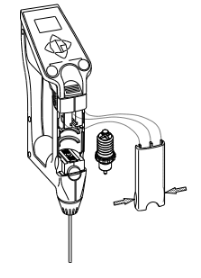
For more viscous samples over 2,000mPa.s it's a good idea to use the optional syringe adapter set. Almost any commerciall available syringe (plastic works great) will work. You just need to order the female adapter to make it work (Adapter part number is 12-04428-02)

When working with samples under 2,000mPa.s of viscosity but where samples contain particles or grains that may crystallize when dry we suggest you use the supplied bellows pump (swap out the built-in syringe for this).
We hope this information has been helpful!