Recently, we worked with a customer who owns one of our Volumetric Karl Fischer Titrators (MKV-710) and was experiencing unexpected issues when testing samples with high moisture content. Specifically, the customer observed that certain samples appeared to max out at around 1% moisture, after which the titrator would go into over-titration. Interestingly, this behavior only occurred with specific sample types.
To get to the root of the issue, we stepped back and reviewed the fundamentals of volumetric Karl Fischer titration. This back-to-basics approach helped clarify what was happening—and revealed several practical troubleshooting steps that may help others facing similar challenges.
Understanding the Basics
The MKV-710 Volumetric Karl Fischer Titrator is designed to measure moisture content from trace levels all the way up to 100% water, so measuring above 1% moisture should not be a limitation of the instrument itself.
Reagent Factor Check
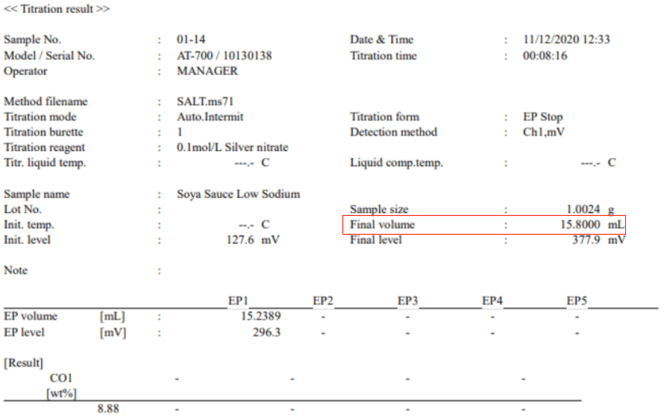
The customer provided data showing that the Karl Fischer reagent factor was properly calculated using Honeywell Hydranal Composite 5, with a factor of:
5.0796 mg/mL
This is a very reasonable value and indicates the reagent and factor calculation were done correctly. Great start.
What Causes Over-Titration?
Over-titration occurs when the instrument delivers more Karl Fischer reagent than is required for the amount of water actually present in the titration cell.
Here’s how the process works:
-
The detector electrode senses moisture in the titration vessel.
-
It signals the titrator to dose Karl Fischer reagent (Composite 5).
-
The reagent reacts with and neutralizes the water.
-
Once all moisture is consumed, the electrode stops detecting water.
-
The instrument then calculates total water based on how much reagent was used.
If the electrode receives inaccurate information, the titrator may continue dosing reagent—leading to over-titration.
The Math Behind the Measurement
Understanding the math helps clarify what the instrument is doing:
-
Composite 5 reagent neutralizes approximately 5 mg of water per mL
-
1 mg = 1,000 micrograms
-
Therefore, 1 mL of reagent ≈ 5,000 micrograms of water
-
All Karl Fischer titrators measure moisture in micrograms
Key Conversions
-
10,000 ppm = 1.0% moisture
-
5,000 ppm = 0.5% moisture
-
1,000 ppm = 0.1% moisture
Moisture Calculation Formula
Moisture (PPM or %) = Water detected (µg) / Sample size (g)
As long as the sample size is known, the moisture result can be accurately calculated from the amount of reagent consumed.

Common Causes of Over-Titration
If the instrument is overdosing reagent, a few common issues may be responsible:
1. Detector Electrode Issues
A faulty or aging detector electrode may not correctly sense when all moisture has been neutralized, sending incorrect signals to the titrator.
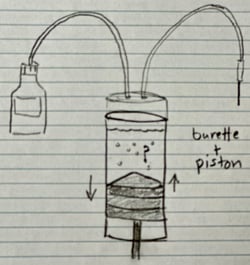
2. Poor Sample Mixing (Very Common)
If the sample does not dissolve or homogenize properly in the titration solvent, moisture can exist in localized “pockets.” This can confuse the detector electrode and cause continued dosing.
Solution:
Improve sample mixing and solubility. In some cases, adding a co-solvent such as xylene can significantly help break down the sample.
Pro Tip: Xylene can be added at up to 20% of the total sample volume to improve solubility.
Additional Pro Tips for Reliable Results
-
Verify Instrument Performance
Run a water check using a micro-drop of pure water. A recovery of 99% or higher confirms the titrator can accurately measure high moisture levels. When combined with a successful factor check, this strongly indicates the instrument is working correctly. -
Increase Pre-Stirring Time
If samples have solubility challenges, adjust the method to stir for 60 seconds before titration begins. This simple change can dramatically improve consistency. -
Use Mixed Solvents When Needed
For stubborn samples, try a solvent blend such as 80% methanol / 20% xylene to improve dissolution. -
Watch for Chemical Interferences
Samples containing ketones, aldehydes, or problematic pH levels can interfere with Karl Fischer reactions and should be evaluated carefully.
Final Thoughts
When high-moisture samples appear to “max out” or cause over-titration, the issue is often sample-related rather than instrument-related. Verifying the basics—reagent factor, instrument performance, electrode condition, and sample mixing—can quickly narrow down the root cause.
A systematic troubleshooting approach not only resolves the immediate problem but also builds confidence in the results moving forward.